MCE Tech Optibay for MacBook Pro Review and How To! [TUTORIAL]
I was lucky enough to get an OptiBay unit from MCE Tech and have had it installed now for about a week. All I have to say is this is exactly what I was looking for. MCE Tech makes a product to replace your internal SuperDrive in your MacBook or MacBook Pro and replace it with a second internal HDD or SSD. I chose HDD and got the kit with the 500GB 7200RPM Drive. I have set it up to be my Time Machine Backup drive and have moved all my installers and other data onto that drive to free up my SSD for applications and the OS.
![]()
SPECIFICATIONS:
From their WebSite:
The OptiBay™ was created by MCE for users who want as much storage capacity as possible inside their MacBook Pro, MacBook, PowerBook G4, iMac, or Mac mini. Period. The OptiBay™ replaces your machine’s internal SuperDrive with a high performance SATA hard drive, or SSD (Solid-State Drive), of up to 1TB… or get just the OptiBay™ drive kit and use your own 2.5″ SATA hard drive or SSD.
PRICE:
The Kit starts at just $99 and includes the OptiBay Unit as well as an external enclosure to put your SuperDrive into so you have an external DVD-ROM Drive. They will even install the Hard Drive into the OptiBay Unit for a marginal price as well, throwing in a 500GB 7200RPM drive for an additional $80. Or you can even get a SSD in the OptiBay as well for an additional $300 for a 128GB drive.
MCE Tech also offers 2 services, one is $49 for you to send them your laptop and they will complete the install, or for $99 they overnight you a box and you ship it back for the install.
PACKAGE:
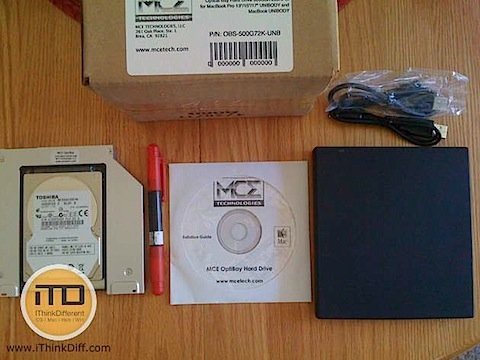
The package includes the external drive enclosure, the OptiBay, a multi tool to help with the screws as well as a CD with instructions on how to complete the upgrade yourself.
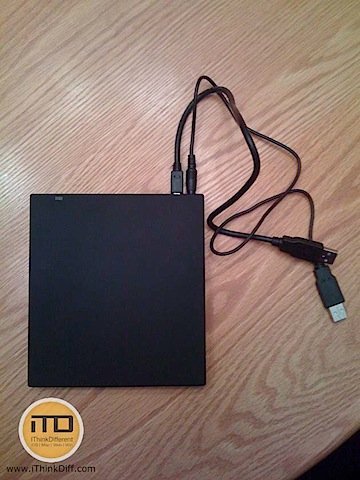
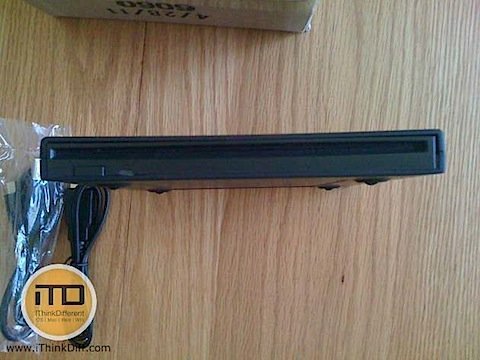
External Drive bay for the SuperDrive that we are going to remove.
Still a slot load drive!
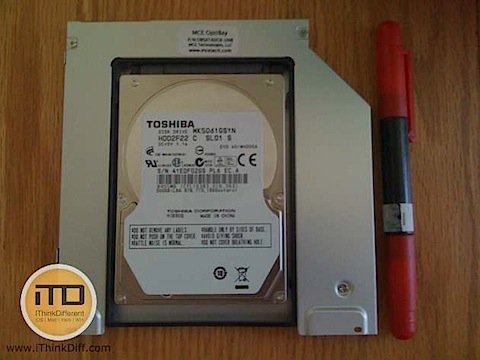
This is the OptiBay and the multi tool that they include in the package.
Now, let’s install the drive. You will need some hex bits as well as the multi tool that is included. Let’s get started!
DISCLAIMER: WE ARE NOT RESPONSIBLE FOR DAMAGE TO YOUR MACBOOK FROM THIS TUTORIAL. IF YOU ARE NOT COMFORTABLE DOING THIS ON YOU OWN, WE RECOMMEND SENDING IT INTO MCE TECH TO HAVE THE DRIVE INSTALLED
First, remove all the screws from the bottom of your MacBook, there should be 10 in total:
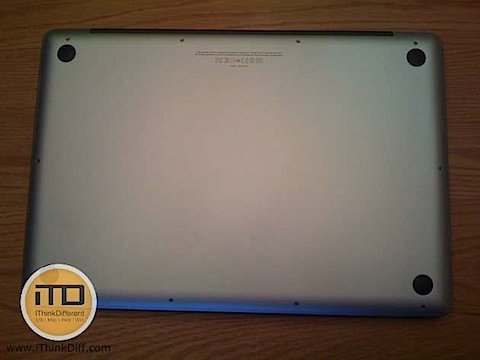
Once you have taken out all the screws, remove the aluminum cover. It may take some force to pop off at first, but will come off fairly easily.
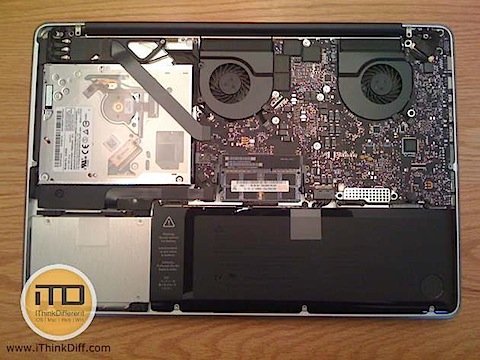
That device at the top left is the SuperDrive that we will be replacing with our second hard drive. Now, we want to unplug the black ribbon covering the drive as well as unscrew the 2 screws holding down the antennas and cables at the very top left. Once that is all complete, there are 3 screws holding in the SuperDrive. 2 in the front and 1 at the rear of the drive, near the SATA connection. Those are hex screws, so will be easier using a hex driver if you have one. if not, a flat head will do fine. Now pull out your SuperDrive.
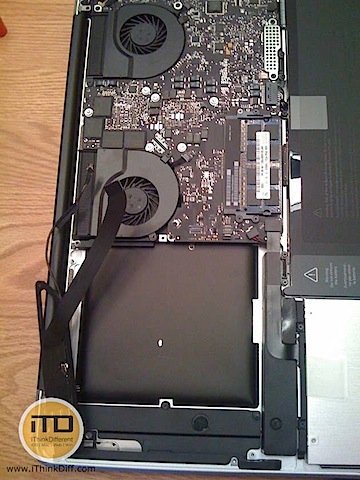
Now we have a gaping hole where we are going to install our new hard drive. Pull off the SATA connector still attached to the SuperDrive and install it onto the new OptiBay. You will also replace the anchor, which is being hold on by 2 screws.
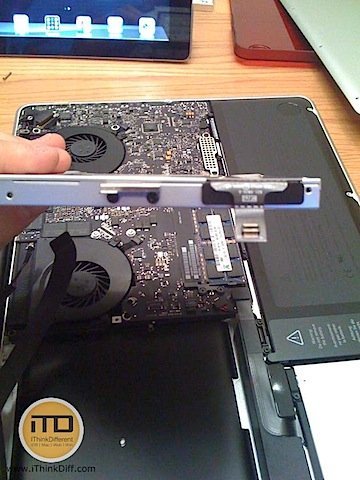
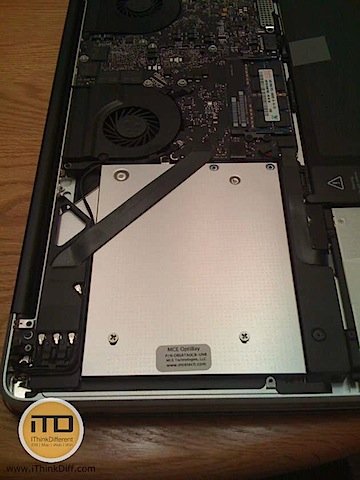
Finally, set your drive in, put the 3 screws back on, reattach the antennas and cable holder with the 2 screws and plug back in the covering ribbon. It should now look like the following:
Finally, put your bottom cover back on, put all 10 screws back in and you’re ready to boot your MacBook back up. Once powered up, go to the Disk Utility. You should now see your new Hard Drive and your original Hard Drive being shown:
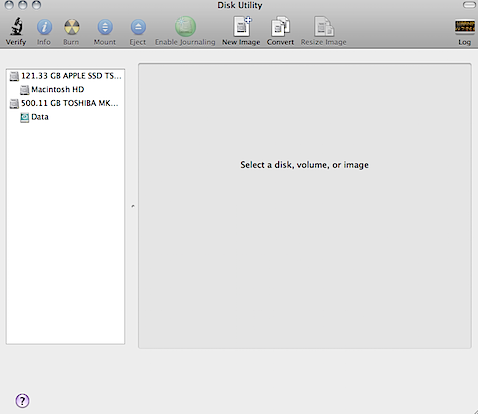
I now have my 128GB SSD and my new 500GB Internal Secondary Hard Drive. Overall, it took less than an hour to complete the process and I would rate the install on a technical level of 6-7 out of 10. The screws were small and in tight spaces, and you need to be careful with the ribbons and connectors.
VERDICT:
If you are looking to add a second Hard Drive to your Mac, and don’t want to carry around an external HDD all the time, then this is a must have! I have not noticed any significant battery loss, or noise from the computer. No excess heat, or humming. It has been an extremely pleasant experience with this drive.
iTD PRODUCT RATING:
![]()
![]()
![]()
![]()
![]()
This is an incredible product with great workmanship and they have fantastic people working at the company. I can’t imagine not having this in my MacBook.
Subscribe to our RSS Feed and keep following us on Twitter, Facebook and YouTube for all the latest news, updates and more.
Related posts:
Powered By WizardRSS.com | Full Text RSS Feed | Amazon Plugin | Settlement Statement | WordPress Tutorials

0 comments:
Leave a Comment